
News News
How to Refurbish Cricket Bat for Peak Performance How to Refurbish Cricket Bat for Peak Performance
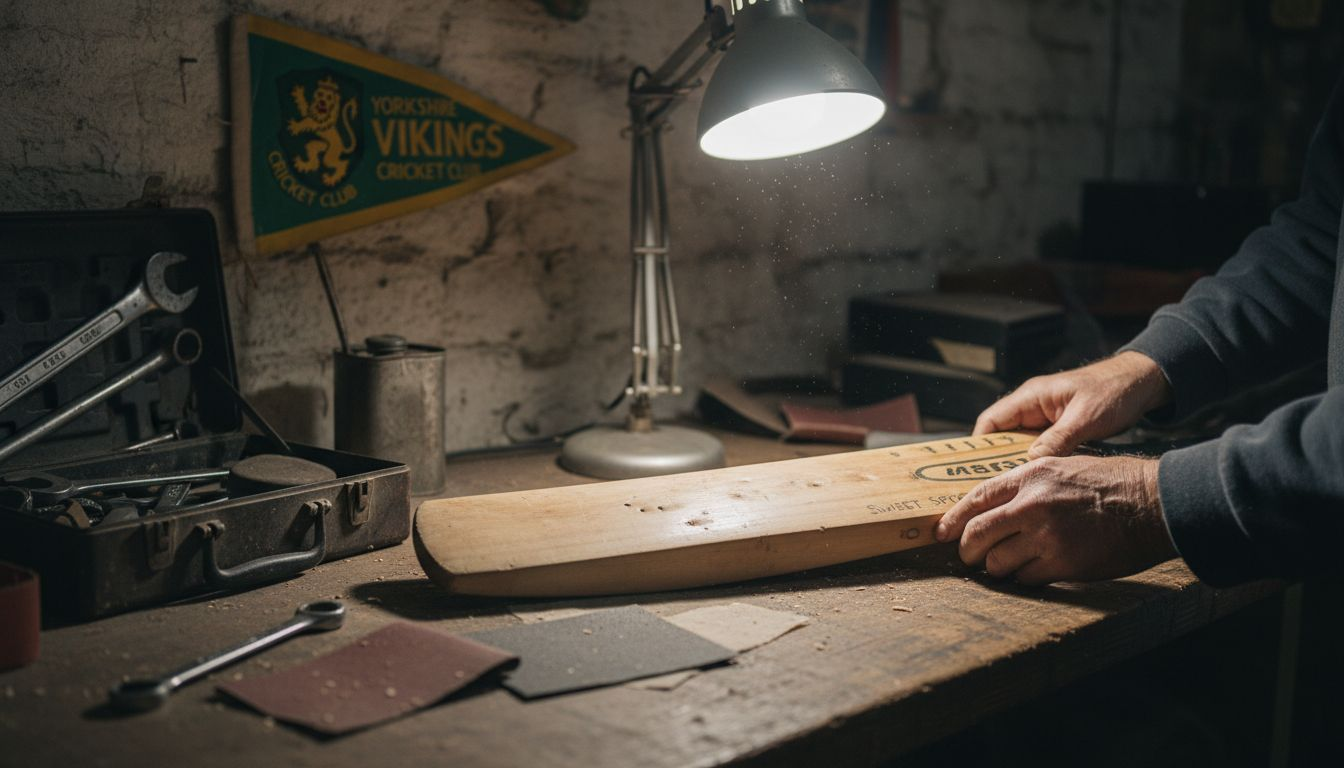
A well maintained cricket bat can increase your scoring potential and save you money across many British cricket seasons. Countless players notice their favourite willow losing snap or showing signs of wear far too soon. Refurbishing your high quality cricket bat is a smart move for any British amateur looking to prolong its lifespan and enjoy a consistent edge on the field. This practical guide walks you through every hands on step, helping you restore both appearance and performance to your trusted bat.
Table of Contents
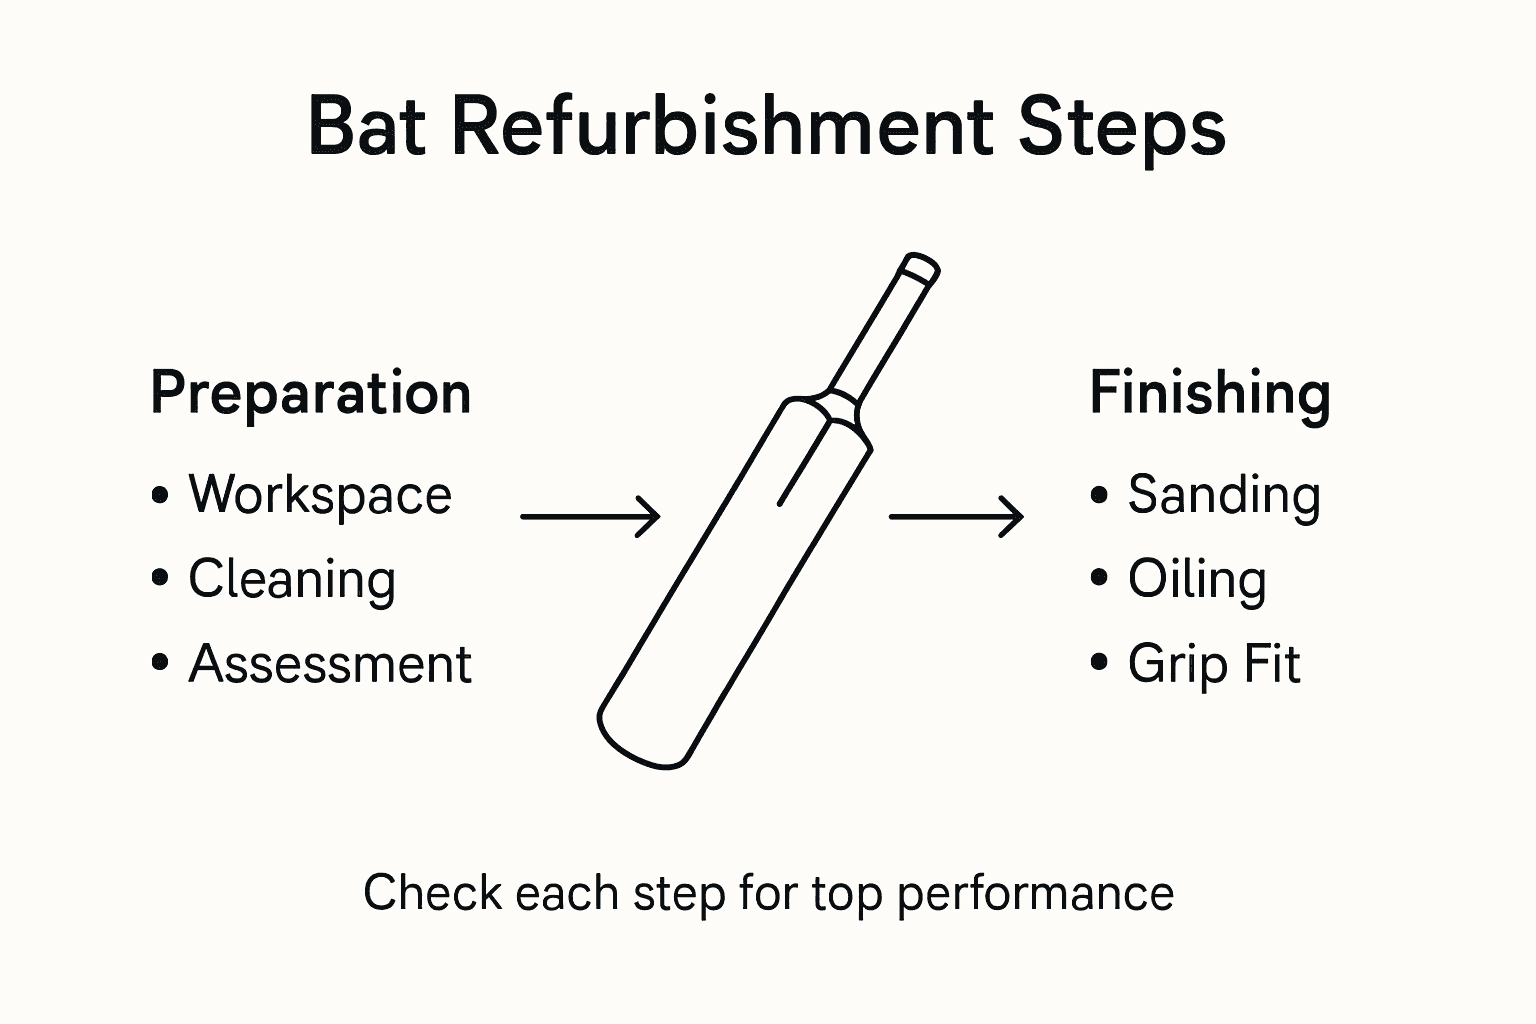
- Step 1: Prepare Workspace And Clean Cricket Bat
- Step 2: Assess Damage And Remove Old Surface Finish
- Step 3: Sand Blade And Edges For Smoothness
- Step 4: Oil And Press Cricket Bat For Durability
- Step 5: Fit New Grip And Inspect For Play-readiness
Quick Summary
| Main Insight | Detailed Explanation |
|---|---|
| 1. Clean Workspace and Bat | Maintain a dust-free, well-lit area to prevent contamination while cleaning your bat. Gather essential cleaning materials for effective results. |
| 2. Assess and Sand | Thoroughly inspect your bat for damage and carefully sand to remove old finishes, revealing fresh wood without compromising integrity. |
| 3. Oil and Press | Use high quality raw linseed oil and apply pressure to enhance durability, ensuring the bat can withstand high impact during play. |
| 4. Replace Grip and Inspect | Install a new grip carefully, ensuring alignment and comfort while performing a final inspection for overall play-readiness. |
Step 1: Prepare workspace and clean cricket bat
Preparing a clean workspace and properly sanitising your cricket bat is the first critical stage in successful bat refurbishment. Your workspace should be well-lit, dust-free, and spacious enough to comfortably manoeuvre around your cricket equipment.
Begin by gathering essential cleaning materials: a soft microfibre cloth, mild soap solution, methylated spirits, and clean lint-free towels. Cricket bat restoration requires precision and care. Traditional willow wood bats demand gentle handling to prevent moisture damage during cleaning. Wipe the bat surface systematically using a slightly damp cloth, removing accumulated dirt and old grip residues without saturating the wood. Pay special attention to edges and handle areas where grime tends to accumulate.
Ensure your workspace is organised with cleaning materials within easy reach and a stable surface to prevent accidental bat damage. Work methodically and avoid rushed movements that might compromise your bat’s integrity.
To assist with choosing appropriate cleaning products, here is a quick reference table:
| Cleaning Material | Typical Use | Impact on Bat Condition |
|---|---|---|
| Microfibre cloth | Removes surface dust and grime | Preserves wood finish, gentle touch |
| Mild soap solution | Cleans stubborn dirt | Minimises risk of wood damage |
| Methylated spirits | Eliminates sticky residue | Avoids moisture absorption |
| Lint-free towels | Dries and buffs bat | Prevents lint transfer to surface |
Pro tip: Always test cleaning solutions on a small, inconspicuous area of the bat first to ensure no adverse reactions with the wood’s protective coating.
Step 2: Assess damage and remove old surface finish
Assessing the condition of your cricket bat is a crucial step in refurbishment that determines the extent of restoration needed. This stage requires careful inspection and methodical removal of damaged or worn surface layers to prepare for potential repairs.
Begin by examining the entire bat surface under good lighting. Look for critical indicators of wood damage such as cracks or structural wear. Run your fingers gently along the blade, checking for uneven surfaces or subtle imperfections. Pay particular attention to the edges and toe area where cricket bats typically experience most impact stress. Using fine grit sandpaper typically between 120 and 180 grade, carefully sand the surface to remove old protective coatings. The goal is to strip away worn layers without compromising the wood’s structural integrity.
Move systematically across the bat surface using light pressure and consistent strokes. This technique ensures you remove old finishes uniformly while preserving the natural wood grain. Your sanding should reveal a clean, smooth surface ready for subsequent treatment and refinishing.
Pro tip: Always use a sanding block to maintain even pressure and prevent accidental gouging of the bat’s delicate willow surface.
Step 3: Sand blade and edges for smoothness
Sanding your cricket bat is a precision task that transforms its surface from rough to professionally smooth. This critical stage requires patience, careful technique, and understanding of wood preparation to restore your bat’s performance potential.
Begin with medium grit sandpaper around 120 grade to tackle initial surface irregularities. Superfinishing techniques recommend using controlled motions that follow the wood grain precisely. Work systematically along the blade surface using light pressure and consistent strokes. When sanding the edges, exercise extreme caution to maintain the bat’s original shape and prevent unnecessary material removal. Progress gradually through increasingly finer sandpaper grades 180 to 220 to achieve a progressively smoother finish.
Carefully inspect the bat after each sanding phase, ensuring you are creating an even surface without compromising the bat’s structural integrity. Your goal is a uniform smooth texture that feels silky to the touch while preserving the natural characteristics of the willow wood.
Pro tip: Always sand with the wood grain and use a sanding block to distribute pressure evenly and prevent accidental gouging.
Step 4: Oil and press cricket bat for durability
Oiling and pressing your cricket bat are crucial final steps in refurbishment that dramatically enhance its performance and longevity. These techniques protect the willow wood and optimise the bat’s structural integrity for intense cricket play.
Begin by selecting high quality raw linseed oil, applying thin layers using a soft lint-free cloth. Wood preservation techniques recommend working the oil into the bat surface systematically, ensuring complete and even coverage. Allow each oil layer to absorb completely before applying the next. After oiling, use a manual or mechanical press to compress the bat’s fibres. Apply steady, controlled pressure to realign the wood grain and increase durability. This process helps prevent potential cracking and maintains the bat’s resilience during high impact cricket gameplay.
Carefully monitor the oiling and pressing process, ensuring you do not oversaturate the wood or apply excessive pressure. The goal is to create a balanced, resilient surface that can withstand the rigours of competitive cricket while maintaining the bat’s natural flexibility and responsiveness.
Pro tip: Apply oil in thin layers and allow complete absorption between coats to prevent oversaturation and potential wood damage.
Step 5: Fit new grip and inspect for play-readiness
The final stage of cricket bat refurbishment involves installing a fresh grip and conducting a comprehensive inspection to ensure your bat is ready for peak performance. This process not only enhances your playing comfort but also provides an opportunity to assess the bat’s overall condition.
Begin by completely removing the old grip, ensuring the handle is clean and free from any residual adhesive. Installing a new grip requires precision and careful alignment. Start at the bottom of the handle, gradually working the new rubber grip upwards, smoothing out any potential air bubbles or creases. Ensure the grip is stretched evenly and sits snugly against the handle, providing a secure and comfortable hold. Take your time to align the grip perfectly, as this directly impacts your batting control and feel.
Conduct a thorough final inspection of the entire bat. Check for any imperfections in the blade, handle, or newly installed grip. Run your hands along the surface, feeling for any subtle irregularities. Gently test the bat’s balance and weight, ensuring the refurbishment process has maintained its structural integrity. A well refurbished bat should feel responsive, smooth, and ready to deliver exceptional performance on the cricket pitch.
Pro tip: Warm the new grip slightly with a hairdryer before installation to improve flexibility and ensure a smoother, tighter fit.
Below is a summary table outlining key steps and their main purpose in cricket bat refurbishment:
| Step | Core Action | Desired Outcome |
|---|---|---|
| Clean workspace & bat | Sanitise and organise | Prevents contamination |
| Assess and sand | Remove damaged surface | Reveals fresh wood grain |
| Sand blade and edges | Smooth out rough areas | Achieves uniform texture |
| Oil and press | Protect and strengthen wood | Increases durability |
| Fit grip & inspect | Install new grip, final check | Ensures play-readiness |
Elevate Your Cricket Bat Performance with Expert Equipment
Refurbishing your cricket bat is a detailed process requiring precision from cleaning and sanding to oiling and fitting a new grip. If you seek to maintain peak performance or replace an ageing bat, craftsmanship and quality equipment are essential. At cricketbats.com, we understand the challenges of restoring durability and responsiveness in your bat’s willow surface. Whether you need a top-tier replacement or premium accessories for maintenance, our range helps you play with confidence.

Explore our curated selection of New Balance Cricket Bats and adidas Cricket Bats to find sturdy, performance-enhancing bats that meet your exacting standards. Take advantage of expert craftsmanship backed by trusted brands and free shipping at cricketbats.com. Act now to ensure your cricket gear matches your ambition on the pitch and enjoy the benefits of expertly crafted cricket bats ready for play.
Frequently Asked Questions
How do I prepare my workspace for refurbishing a cricket bat?
Start by ensuring your workspace is well-lit, clean, and organised. Gather essential cleaning materials like a microfibre cloth and mild soap solution, and make sure your workspace is spacious enough to easily manoeuvre around your cricket equipment.
What steps should I follow to clean my cricket bat before refurbishment?
To clean your cricket bat, use a slightly damp microfibre cloth to wipe the surface, focusing on removing dirt and old grip residues without saturating the wood. Pay particular attention to edges and handle areas to ensure a thorough clean, preparing your bat for the refurbishment process.
How can I assess the damage on my cricket bat?
Examine the bat’s surface under good lighting for cracks or structural wear by running your fingers along the blade. If you notice any imperfections, such as uneven surfaces, be prepared to sand the affected areas to restore the bat’s condition and performance.
What techniques should I use for sanding the blade and edges of my cricket bat?
Use medium grit sandpaper, starting with around 120 grade, and sand with the wood grain in controlled motions. Progress gradually to finer grades, like 180 and 220, to achieve a smooth texture, ensuring you maintain the bat’s original shape and avoid unnecessary material removal.
How do I oil and press my cricket bat effectively?
Apply thin layers of high-quality raw linseed oil, working it into the wood with a lint-free cloth and allowing it to absorb before adding more. Once oiled, use a manual or mechanical press to compress the bat, maintaining steady pressure to enhance its durability and prevent cracking during play.
How do I fit a new grip onto my refurbished cricket bat?
Begin by fully removing the old grip and ensuring the handle is clean. Then, install the new grip from the bottom upwards, smoothing out any bubbles or creases for a snug fit, which will improve your batting control and overall experience.
Recommended
A well maintained cricket bat can increase your scoring potential and save you money across many British cricket seasons. Countless players notice their favourite willow losing snap or showing signs of wear far too soon. Refurbishing your high quality cricket bat is a smart move for any British amateur looking to prolong its lifespan and enjoy a consistent edge on the field. This practical guide walks you through every hands on step, helping you restore both appearance and performance to your trusted bat.
Table of Contents
- Step 1: Prepare Workspace And Clean Cricket Bat
- Step 2: Assess Damage And Remove Old Surface Finish
- Step 3: Sand Blade And Edges For Smoothness
- Step 4: Oil And Press Cricket Bat For Durability
- Step 5: Fit New Grip And Inspect For Play-readiness
Quick Summary
| Main Insight | Detailed Explanation |
|---|---|
| 1. Clean Workspace and Bat | Maintain a dust-free, well-lit area to prevent contamination while cleaning your bat. Gather essential cleaning materials for effective results. |
| 2. Assess and Sand | Thoroughly inspect your bat for damage and carefully sand to remove old finishes, revealing fresh wood without compromising integrity. |
| 3. Oil and Press | Use high quality raw linseed oil and apply pressure to enhance durability, ensuring the bat can withstand high impact during play. |
| 4. Replace Grip and Inspect | Install a new grip carefully, ensuring alignment and comfort while performing a final inspection for overall play-readiness. |
Step 1: Prepare workspace and clean cricket bat
Preparing a clean workspace and properly sanitising your cricket bat is the first critical stage in successful bat refurbishment. Your workspace should be well-lit, dust-free, and spacious enough to comfortably manoeuvre around your cricket equipment.
Begin by gathering essential cleaning materials: a soft microfibre cloth, mild soap solution, methylated spirits, and clean lint-free towels. Cricket bat restoration requires precision and care. Traditional willow wood bats demand gentle handling to prevent moisture damage during cleaning. Wipe the bat surface systematically using a slightly damp cloth, removing accumulated dirt and old grip residues without saturating the wood. Pay special attention to edges and handle areas where grime tends to accumulate.
Ensure your workspace is organised with cleaning materials within easy reach and a stable surface to prevent accidental bat damage. Work methodically and avoid rushed movements that might compromise your bat’s integrity.
To assist with choosing appropriate cleaning products, here is a quick reference table:
| Cleaning Material | Typical Use | Impact on Bat Condition |
|---|---|---|
| Microfibre cloth | Removes surface dust and grime | Preserves wood finish, gentle touch |
| Mild soap solution | Cleans stubborn dirt | Minimises risk of wood damage |
| Methylated spirits | Eliminates sticky residue | Avoids moisture absorption |
| Lint-free towels | Dries and buffs bat | Prevents lint transfer to surface |
Pro tip: Always test cleaning solutions on a small, inconspicuous area of the bat first to ensure no adverse reactions with the wood’s protective coating.
Step 2: Assess damage and remove old surface finish
Assessing the condition of your cricket bat is a crucial step in refurbishment that determines the extent of restoration needed. This stage requires careful inspection and methodical removal of damaged or worn surface layers to prepare for potential repairs.
Begin by examining the entire bat surface under good lighting. Look for critical indicators of wood damage such as cracks or structural wear. Run your fingers gently along the blade, checking for uneven surfaces or subtle imperfections. Pay particular attention to the edges and toe area where cricket bats typically experience most impact stress. Using fine grit sandpaper typically between 120 and 180 grade, carefully sand the surface to remove old protective coatings. The goal is to strip away worn layers without compromising the wood’s structural integrity.
Move systematically across the bat surface using light pressure and consistent strokes. This technique ensures you remove old finishes uniformly while preserving the natural wood grain. Your sanding should reveal a clean, smooth surface ready for subsequent treatment and refinishing.
Pro tip: Always use a sanding block to maintain even pressure and prevent accidental gouging of the bat’s delicate willow surface.
Step 3: Sand blade and edges for smoothness
Sanding your cricket bat is a precision task that transforms its surface from rough to professionally smooth. This critical stage requires patience, careful technique, and understanding of wood preparation to restore your bat’s performance potential.
Begin with medium grit sandpaper around 120 grade to tackle initial surface irregularities. Superfinishing techniques recommend using controlled motions that follow the wood grain precisely. Work systematically along the blade surface using light pressure and consistent strokes. When sanding the edges, exercise extreme caution to maintain the bat’s original shape and prevent unnecessary material removal. Progress gradually through increasingly finer sandpaper grades 180 to 220 to achieve a progressively smoother finish.
Carefully inspect the bat after each sanding phase, ensuring you are creating an even surface without compromising the bat’s structural integrity. Your goal is a uniform smooth texture that feels silky to the touch while preserving the natural characteristics of the willow wood.
Pro tip: Always sand with the wood grain and use a sanding block to distribute pressure evenly and prevent accidental gouging.
Step 4: Oil and press cricket bat for durability
Oiling and pressing your cricket bat are crucial final steps in refurbishment that dramatically enhance its performance and longevity. These techniques protect the willow wood and optimise the bat’s structural integrity for intense cricket play.
Begin by selecting high quality raw linseed oil, applying thin layers using a soft lint-free cloth. Wood preservation techniques recommend working the oil into the bat surface systematically, ensuring complete and even coverage. Allow each oil layer to absorb completely before applying the next. After oiling, use a manual or mechanical press to compress the bat’s fibres. Apply steady, controlled pressure to realign the wood grain and increase durability. This process helps prevent potential cracking and maintains the bat’s resilience during high impact cricket gameplay.
Carefully monitor the oiling and pressing process, ensuring you do not oversaturate the wood or apply excessive pressure. The goal is to create a balanced, resilient surface that can withstand the rigours of competitive cricket while maintaining the bat’s natural flexibility and responsiveness.
Pro tip: Apply oil in thin layers and allow complete absorption between coats to prevent oversaturation and potential wood damage.
Step 5: Fit new grip and inspect for play-readiness
The final stage of cricket bat refurbishment involves installing a fresh grip and conducting a comprehensive inspection to ensure your bat is ready for peak performance. This process not only enhances your playing comfort but also provides an opportunity to assess the bat’s overall condition.
Begin by completely removing the old grip, ensuring the handle is clean and free from any residual adhesive. Installing a new grip requires precision and careful alignment. Start at the bottom of the handle, gradually working the new rubber grip upwards, smoothing out any potential air bubbles or creases. Ensure the grip is stretched evenly and sits snugly against the handle, providing a secure and comfortable hold. Take your time to align the grip perfectly, as this directly impacts your batting control and feel.
Conduct a thorough final inspection of the entire bat. Check for any imperfections in the blade, handle, or newly installed grip. Run your hands along the surface, feeling for any subtle irregularities. Gently test the bat’s balance and weight, ensuring the refurbishment process has maintained its structural integrity. A well refurbished bat should feel responsive, smooth, and ready to deliver exceptional performance on the cricket pitch.
Pro tip: Warm the new grip slightly with a hairdryer before installation to improve flexibility and ensure a smoother, tighter fit.
Below is a summary table outlining key steps and their main purpose in cricket bat refurbishment:
| Step | Core Action | Desired Outcome |
|---|---|---|
| Clean workspace & bat | Sanitise and organise | Prevents contamination |
| Assess and sand | Remove damaged surface | Reveals fresh wood grain |
| Sand blade and edges | Smooth out rough areas | Achieves uniform texture |
| Oil and press | Protect and strengthen wood | Increases durability |
| Fit grip & inspect | Install new grip, final check | Ensures play-readiness |
Elevate Your Cricket Bat Performance with Expert Equipment
Refurbishing your cricket bat is a detailed process requiring precision from cleaning and sanding to oiling and fitting a new grip. If you seek to maintain peak performance or replace an ageing bat, craftsmanship and quality equipment are essential. At cricketbats.com, we understand the challenges of restoring durability and responsiveness in your bat’s willow surface. Whether you need a top-tier replacement or premium accessories for maintenance, our range helps you play with confidence.
Explore our curated selection of New Balance Cricket Bats and adidas Cricket Bats to find sturdy, performance-enhancing bats that meet your exacting standards. Take advantage of expert craftsmanship backed by trusted brands and free shipping at cricketbats.com. Act now to ensure your cricket gear matches your ambition on the pitch and enjoy the benefits of expertly crafted cricket bats ready for play.
Frequently Asked Questions
How do I prepare my workspace for refurbishing a cricket bat?
Start by ensuring your workspace is well-lit, clean, and organised. Gather essential cleaning materials like a microfibre cloth and mild soap solution, and make sure your workspace is spacious enough to easily manoeuvre around your cricket equipment.
What steps should I follow to clean my cricket bat before refurbishment?
To clean your cricket bat, use a slightly damp microfibre cloth to wipe the surface, focusing on removing dirt and old grip residues without saturating the wood. Pay particular attention to edges and handle areas to ensure a thorough clean, preparing your bat for the refurbishment process.
How can I assess the damage on my cricket bat?
Examine the bat’s surface under good lighting for cracks or structural wear by running your fingers along the blade. If you notice any imperfections, such as uneven surfaces, be prepared to sand the affected areas to restore the bat’s condition and performance.
What techniques should I use for sanding the blade and edges of my cricket bat?
Use medium grit sandpaper, starting with around 120 grade, and sand with the wood grain in controlled motions. Progress gradually to finer grades, like 180 and 220, to achieve a smooth texture, ensuring you maintain the bat’s original shape and avoid unnecessary material removal.
How do I oil and press my cricket bat effectively?
Apply thin layers of high-quality raw linseed oil, working it into the wood with a lint-free cloth and allowing it to absorb before adding more. Once oiled, use a manual or mechanical press to compress the bat, maintaining steady pressure to enhance its durability and prevent cracking during play.
How do I fit a new grip onto my refurbished cricket bat?
Begin by fully removing the old grip and ensuring the handle is clean. Then, install the new grip from the bottom upwards, smoothing out any bubbles or creases for a snug fit, which will improve your batting control and overall experience.